First Run
Before anything else, make sure you have installed the picodaq
library and that you can import it into your Python
session.
Making connections
The first step after that is to connect your picoDAQ device to your computer with a USB cable. Your computer may take a few moments sniffing out its new friend, but pretty soon, the “status” light on your picoDAQ should turn a reassuring pink, indicating readiness to receive instructions. If not, check the Troubleshooting section below.
Acquiring some data
For this very first test, do not attach anything to the picoDAQ’s BNC connectors.
Run the following snippet of Python code, either through an IDE or directly in the Python prompt:
from picodaq import *
import matplotlib.pyplot as plt

with AnalogIn(channel=0, rate=10*kHz) as ai:
    data = ai.read(1000)

plt.plot(data)
plt.show()
That will acquire 100 ms of data from channel “ai0”. Since nothing is physically connected to that channel, you will only record noise. If you put a finger on the shell of the connector while recording, you will get a much larger signal.
Today in my office, the results look like this:
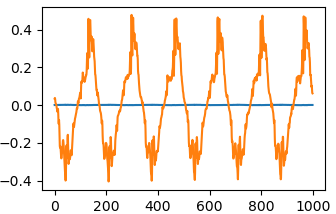
The horizontal axis is measured in samples, so this trace represents
100 ms. The vertical axis is in Volts. The blue trace represents the
first recording, the orange one a recording during which I touched the
connector to induce additional pickup. (I ran the with .. plot part
of the code twice.)
Next steps
That is it! If you got this far, your device is up and running and you are off to the races. To guide you on your next steps:
A set of Cookbook Recipes demonstrates the use of picoDAQ in different data acquisition scenarios.
A complete API Reference delves into the full the functionality of the
AnalogInclass and its friends.The Hardware Specifications of the picoDAQ boards detail the limits of what you can achieve with these devices.
Troubleshooting
If the LED does not turn on, first try a different USB cable or a different USB port.
If that does not help, check if the picoDAQ shows up in your computer’s device tree. For instance, in Linux, if you type
lsusb
into a terminal, you should see
Bus 003 Device 099: ID 2e8a:000a Pasadena Neurotech picoDAQ
among the list of devices. (The “Bus” and “Device” numbers will be different on your computer.) Likewise, in Windows, a line like “USB Serial Device (COM3)” should show up under “Ports (COM & LPT)” in the “Device Manager”. If you right-click on that line, choose “Properties”, navigate to the “Details” tab, and select “Hardware Ids” from the “Property” pull down, you should see “VID_2E8A&PID_000A” among the spaghetti.
If the device shows up in the device tree, but does not work, try
uninstalling any driver that may have attached itself to the
device. In Linux this may involve editing the system files in
/etc/udev/rules.d. In Windows, the “Device Manager” allows you to
do this directly. Then, physically unplug the device and plug it back
in. PicoDAQ should not need any drivers.